It is very important in Castle Age to build up a large army. When you add names one at a time it can take you months or even years to reach your 500+ mark. In addition, you may have already had the experience after adding 2 or 3 names being stopped by Facebook because they think you are spamming. By mass adding you can add 100+ names in just a couple of minutes with very little effort. Furthermore, when you are a member of a guild or organization it is vital that you add these members to your army so that you can communicate together during a battle, or be able to fight in a member's battle (Many battles will not allow you to join unless you are a member of the person's army who summoned the battle). Many organizations such as STOMP have prepared lists of members so that you can mass add the list to first your friends and then your army. If you are not a member of STOMP you would follow the same directions, but you would use the list provided by your own organization.
1. Go to your home page of Facebook and find the name of your organization on the lefthand side of the page. If you do not see it, click See All and the list of all the organizations you belong to will appear. When you see the name of your organization, click it and the home page of the organization will appear. So for those who are members of STOMP you will click STOMP.


2. Another way you can find your organization is to type the name of the organization in the Search box at the top of Facebook. So to find the STOMP organization you type in STOMP. Click the magnifying glass to the right and a list will show of probably matches. Find your organization and click on it.

3. Once you are on the Home page of your organization click on Discussion.

4. Find the topic that says Mass Adding Members or a title similar to this and click it.

5. You will see a long list of member names and their email addresses. You will take your cursor and place it at the top of the list, right click and hold the click down until you drag it over all the names. When all the names are covered let go of the click.


6. Now right click your mouse and a menu will drop down. Left click Copy on the menu. You have now saved the list and are ready to paste.

7. Now go back to your Facebook home page and click on Account in the upper right corner of the page. A drop down menu will appear.

8. Go down the menu and find Edit Friends and click.

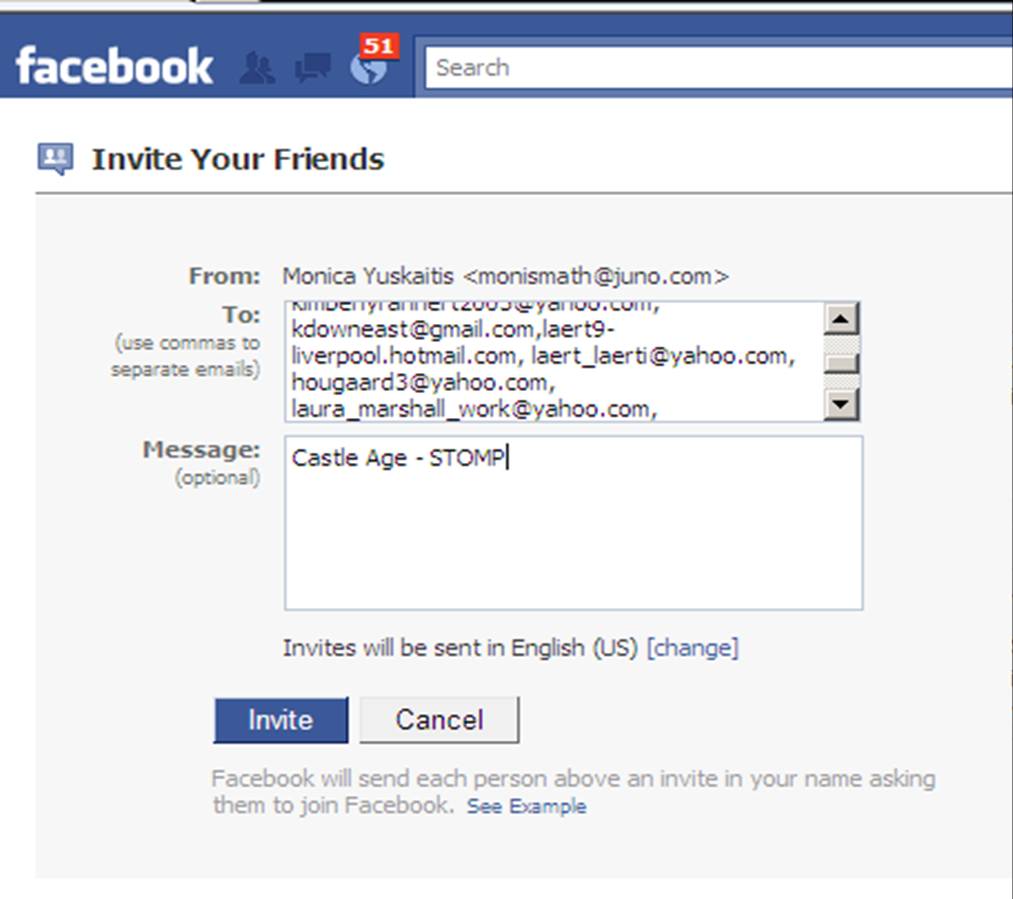
9. On the righthand of the page you will see the words Invite Friends. Click it.

10. Two empty boxes will appear. In the top box that says To: you will paste your email addresses that you copied from your organization. You do this by placing your cursor inside the top box, right clicking the mouse and choosing Paste from the menu. You will immediately see the email addresses in the top box.


11. In the bottom box called Message you will type the words Castle Age and the name of your organization. In this case, you will type Castle Age - STOMP so the person receiving the invitation will know you are from STOMP. And finally you click the bottom button Invite and everyone on your list will receive an invitation to be your friend.
12. You will know if it worked if a list of friends comes up as on this page.

No comments:
Post a Comment